Sheet 003 · Home Automation
Teaching My Dryer to Talk to Home Assistant
How I got local, cloud-free status from my Maytag dryer: backing up its Wi-Fi module, decoding the internal WIN bus, and a receive-only ESPHome sniffer for Home Assistant.
- Date
- Read
- 8 min
- Sheet
- 003
- Sections
- 9
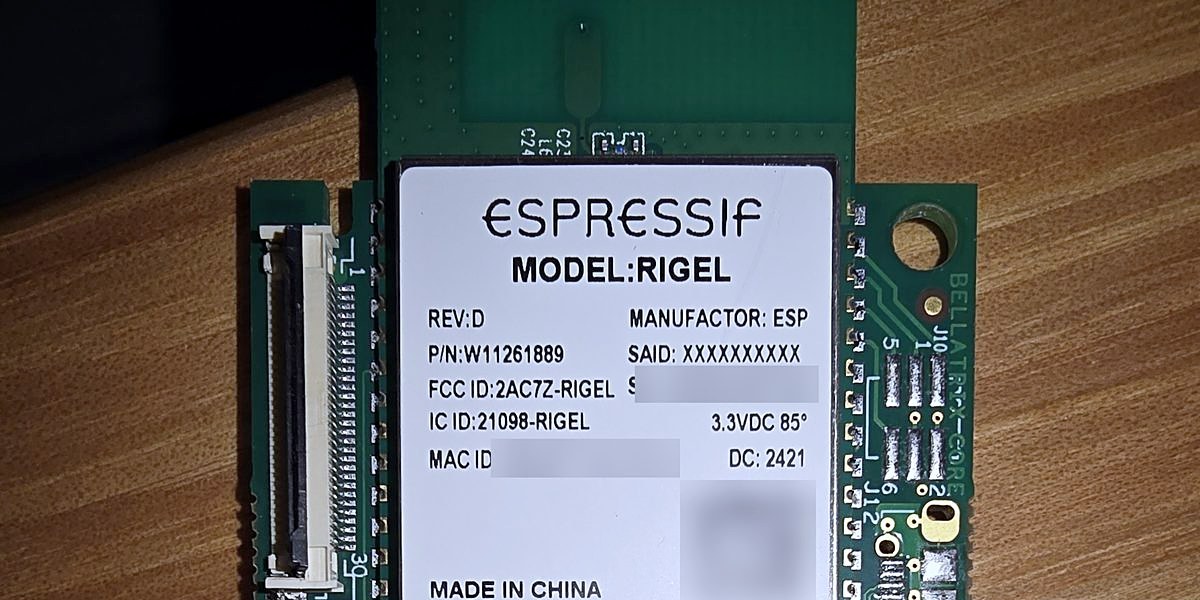
All I wanted was a notification when the dryer finished. The washer already tells Home Assistant when it’s done, so the clothes sitting damp in the dryer for three hours had become the weak link. The dryer is a Maytag MGD7230HW3, and it does have Wi-Fi. It just only talks to Whirlpool’s cloud and their app.
This is the story of getting that status locally instead, one wire at a time. The code and notes are on GitHub: maytag-dryer-esphome.
I worked through this with Claude as a pair: it did a lot of the decoding, reading and note-keeping while I did the hands-on work with the screwdriver and the soldering iron.
Step 1: Could I just intercept the cloud?
The first idea was the easy one. Some appliances can be fooled by pointing their cloud hostname at a local server. So I watched what the dryer did on the network and poked at the endpoints it uses.
The answer came back quickly: no. Whirlpool’s appliance cloud runs on AWS IoT Core, and the MQTT connection uses mutual TLS. The server asks the dryer for its own certificate, and the dryer checks the server against a set of public root certificates baked into its firmware. A fake local server can’t pass either check. Dead end, but a useful one, because it told me the real path was inside the machine. (Notes: docs/cloud.md.)
Step 2: Open the console, find the module
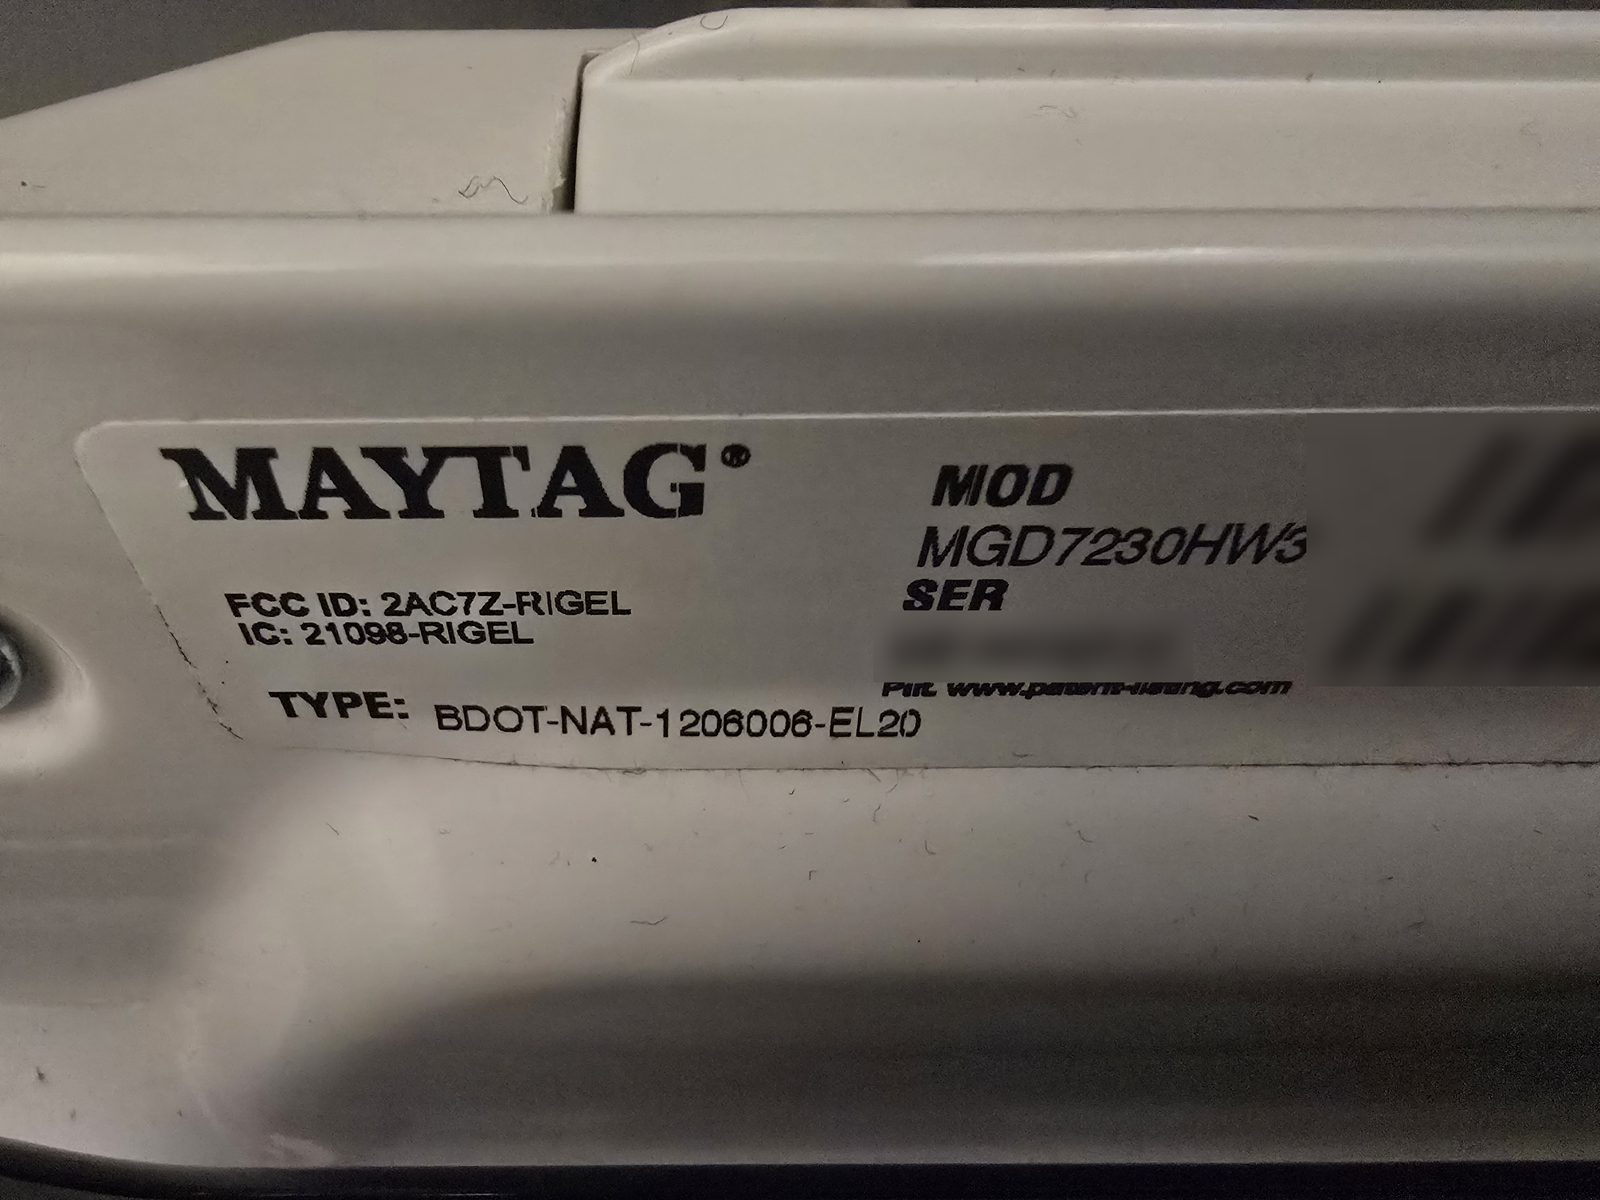
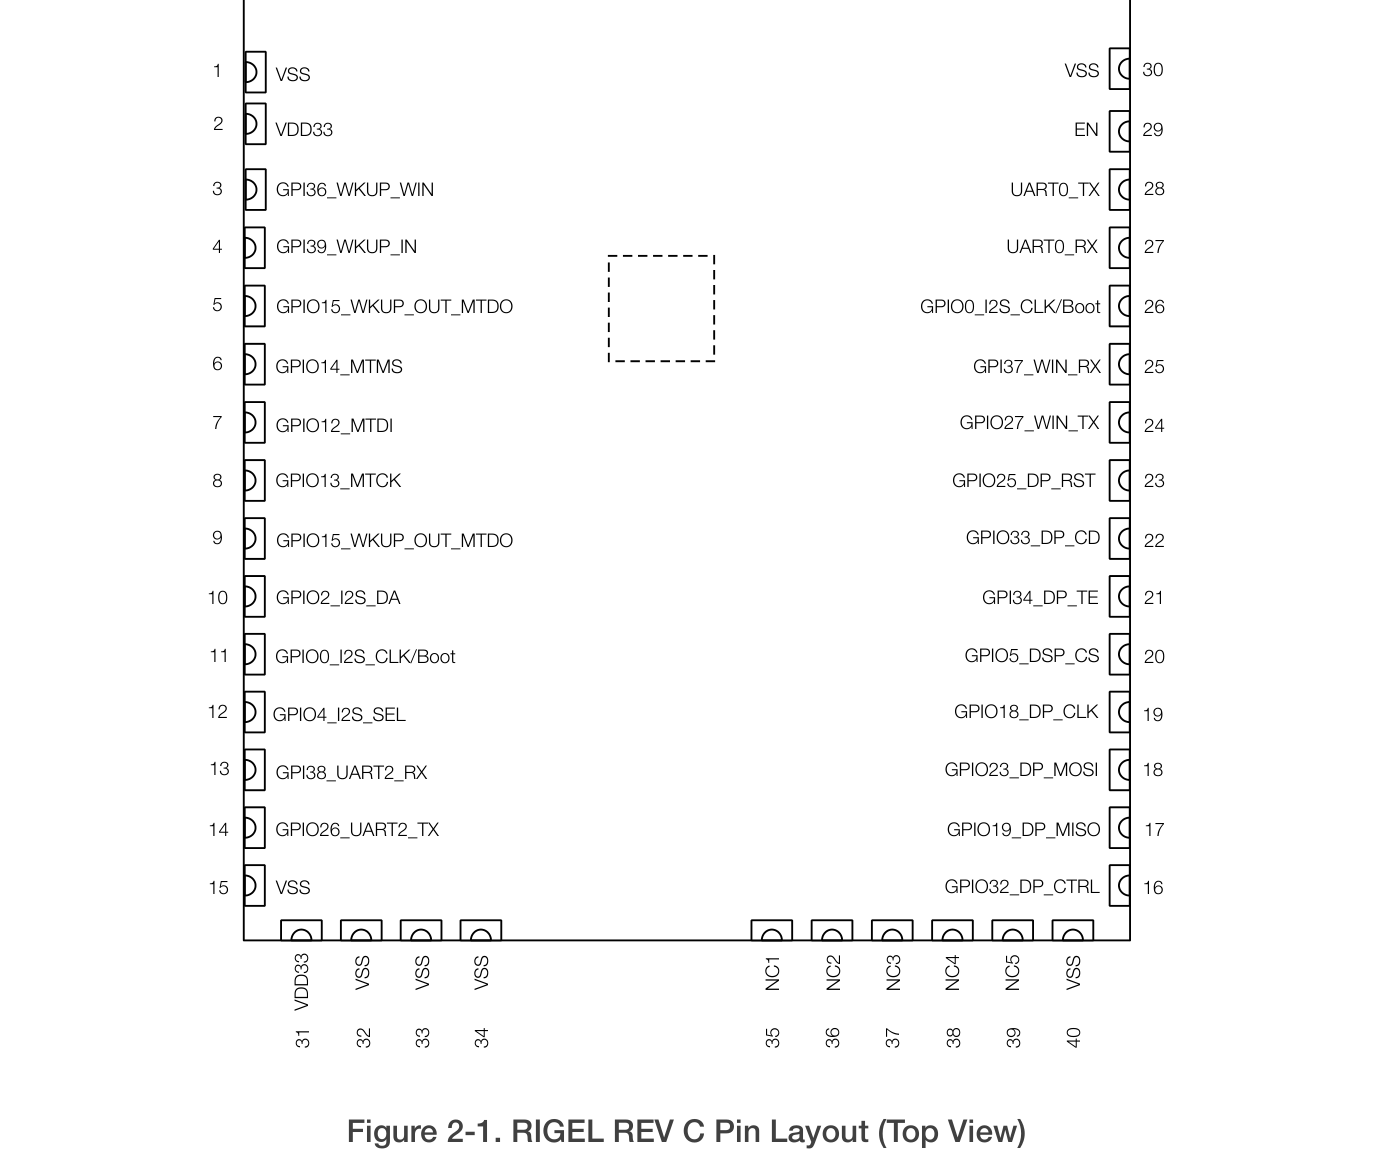
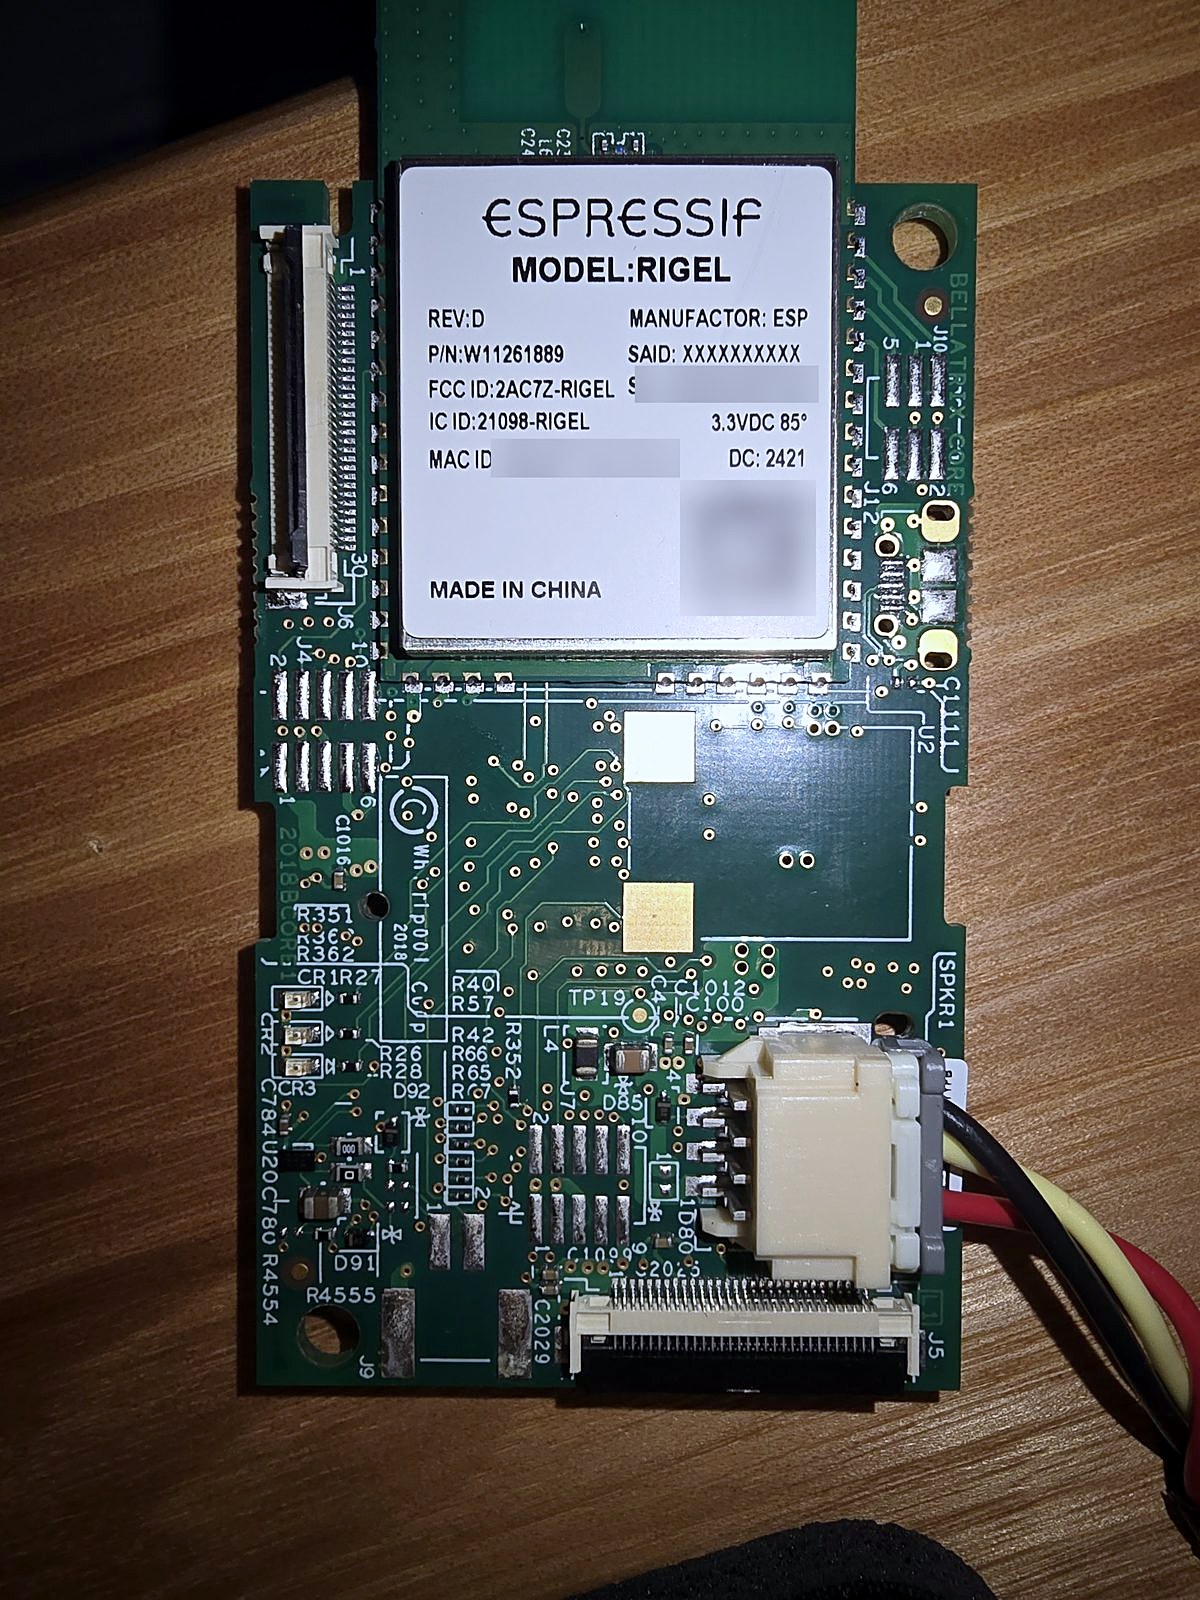
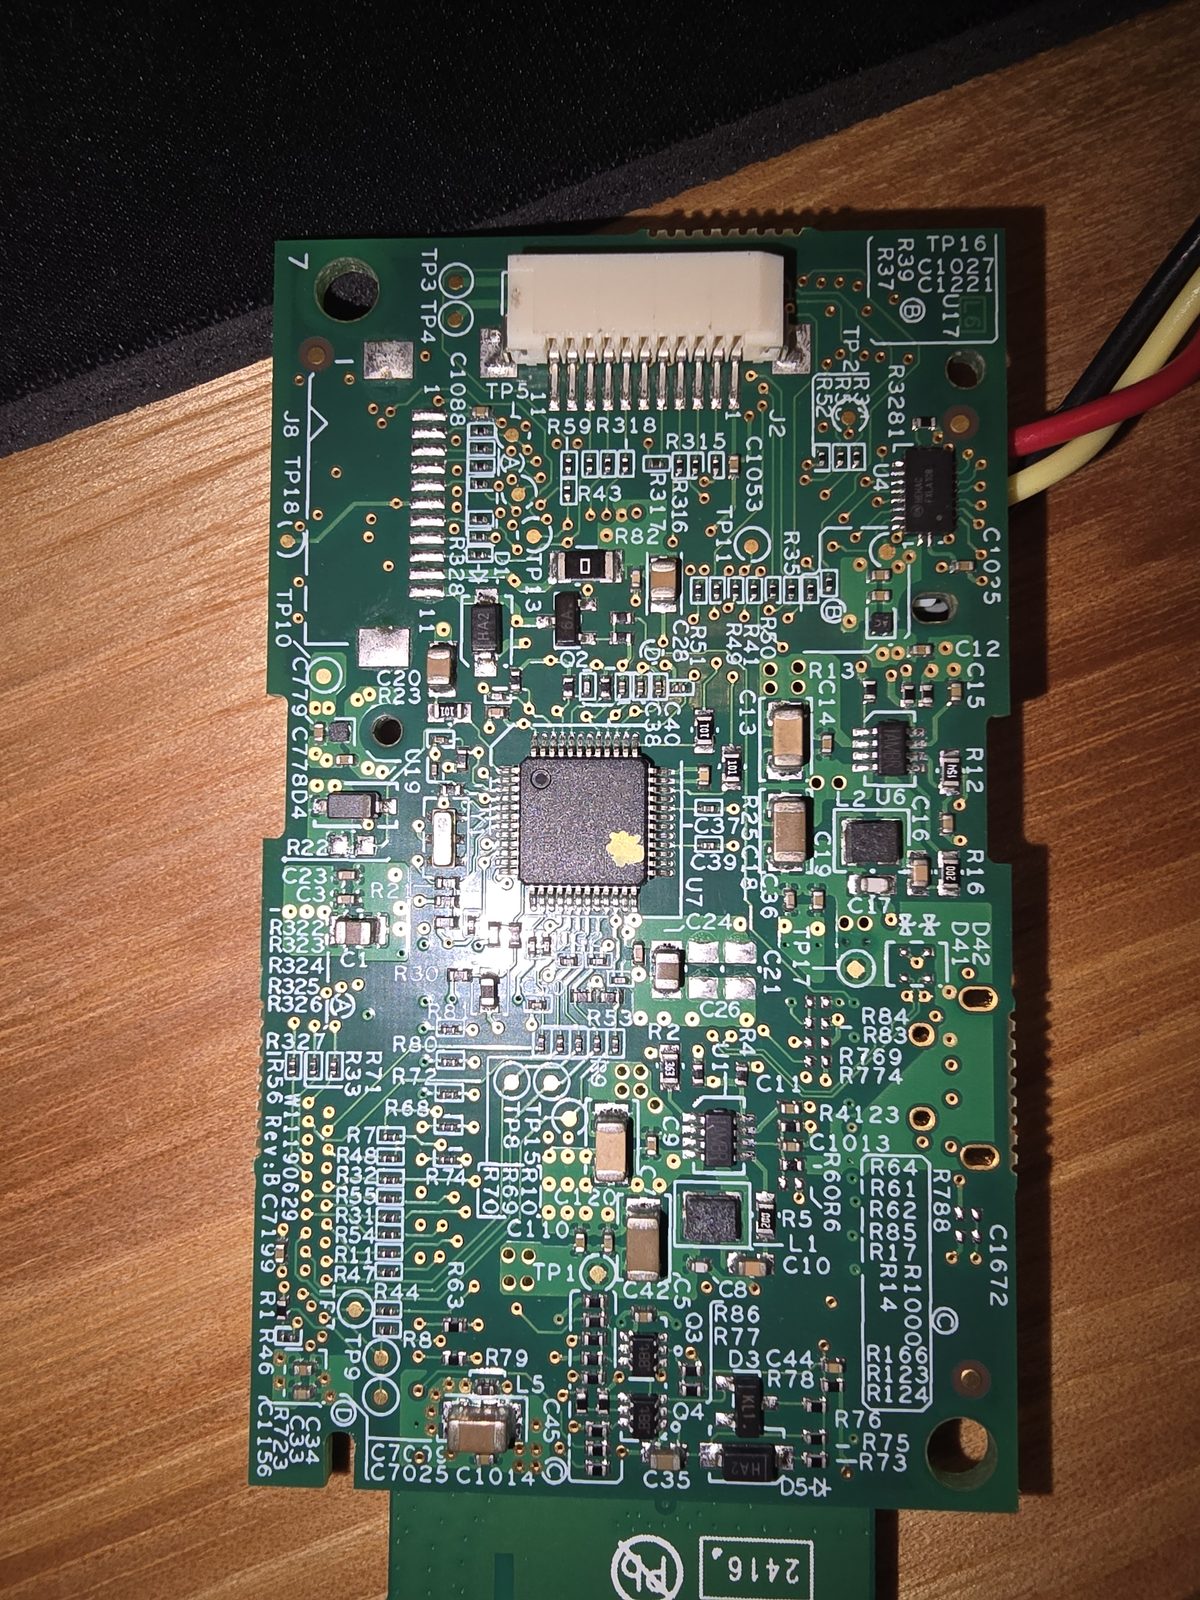
With the dryer unplugged, a few screws on the back of the console let it tilt forward. The Wi-Fi lives on a small daughterboard: an Espressif-built ESP32 module Whirlpool calls RIGEL. The rating label even lists the module’s FCC ID, 2AC7Z-RIGEL. Its FCC filing included a datasheet with the full pinout, which was the best gift of the whole project. Two of those pads are labelled as the appliance bus, and four more are the standard ESP32 programming interface. I wrote the pinout up in docs/hardware.md.
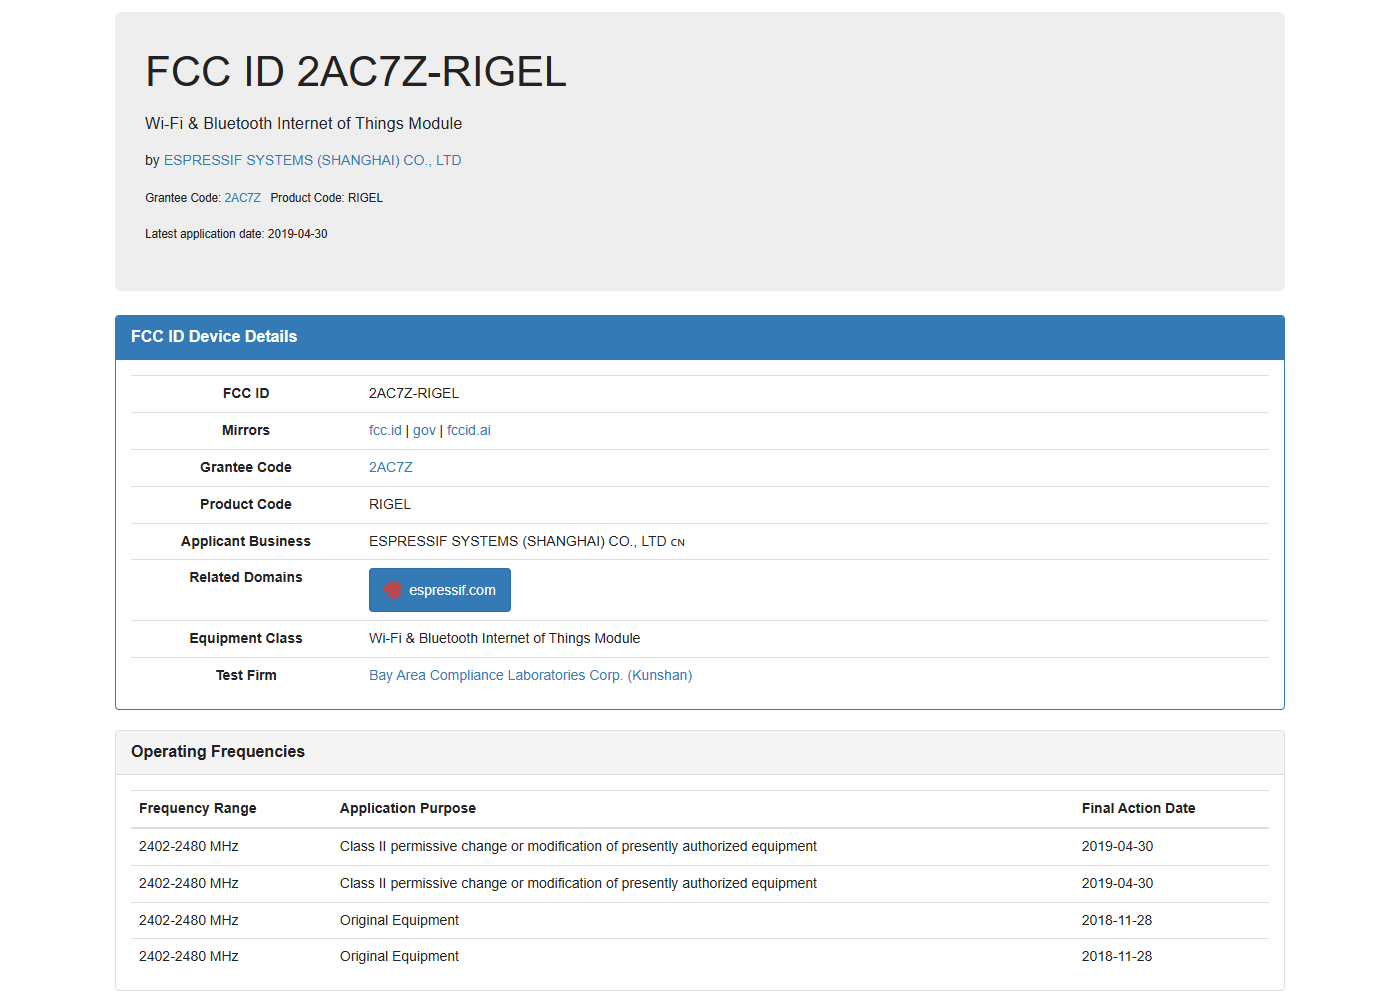
Everything below comes from the public FCC filing for 2AC7Z-RIGEL. The listing shows the module is Espressif’s, certified in 2018:
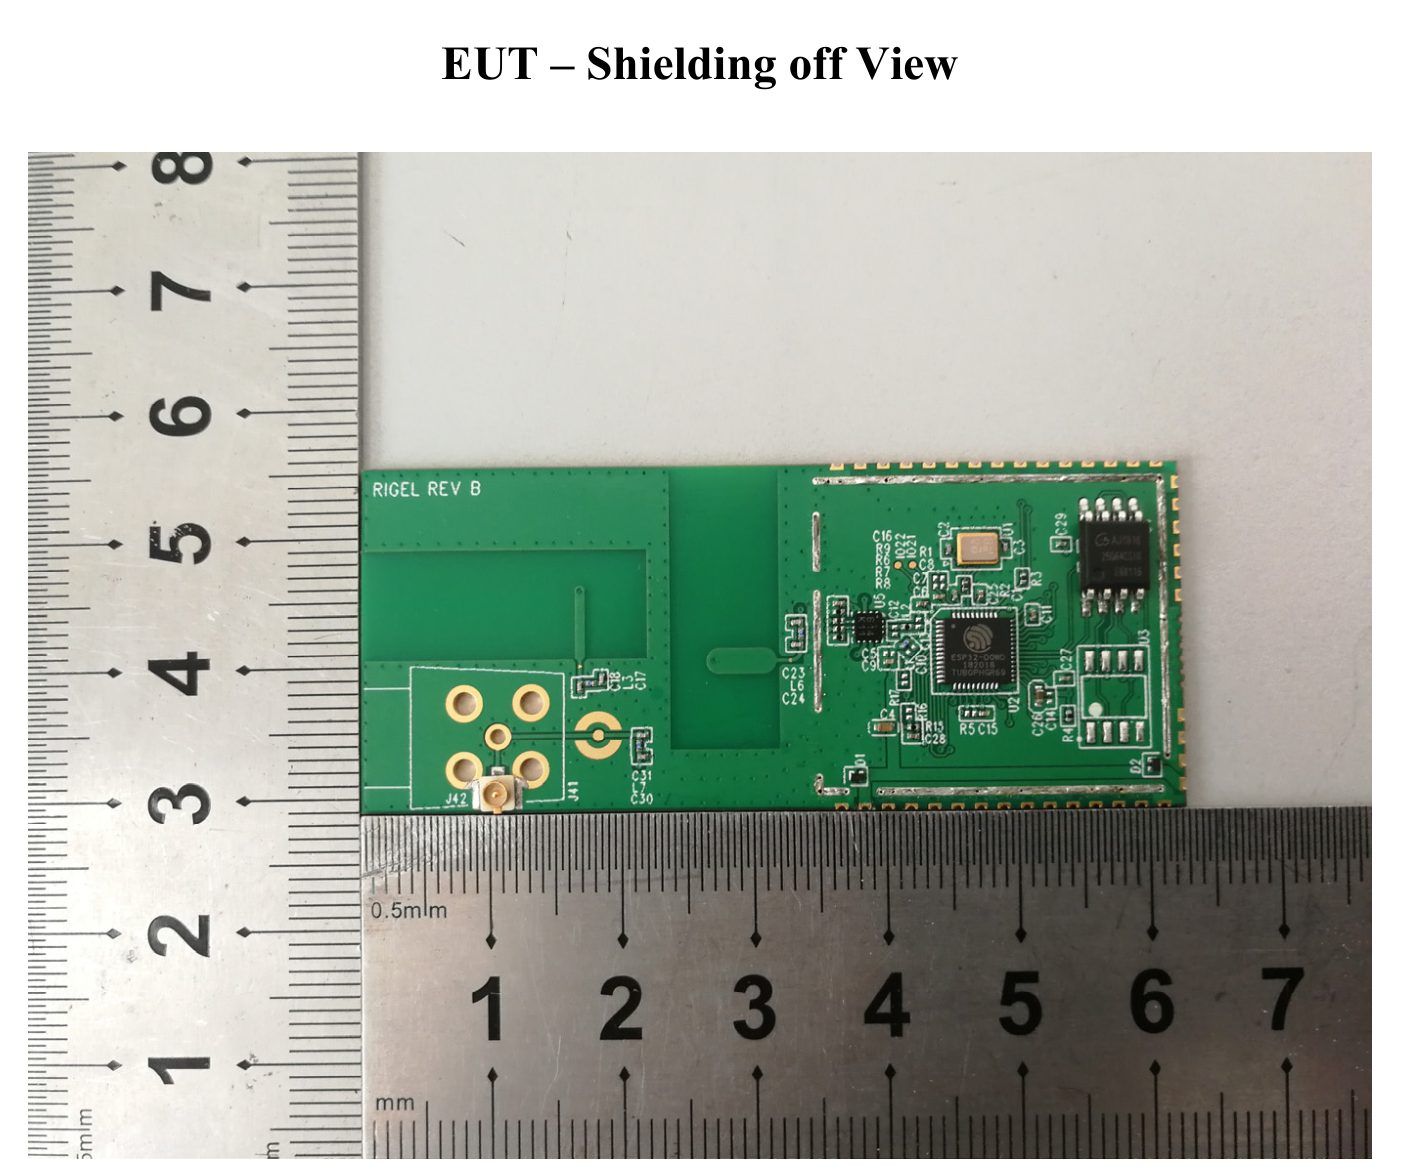
The internal photos show the board with its shield off: the ESP32, the SPI flash chip, the crystal and the PCB antennas. That’s the REV B board; mine is a later revision.
The real prize was the datasheet, filed as the user manual. Pin 24 (GPIO27_WIN_TX) and pin 25 (GPI37_WIN_RX) are the appliance bus, and pins 26 to 28 are the boot pin and UART0 for flashing.
Step 3: Back up the firmware before touching anything
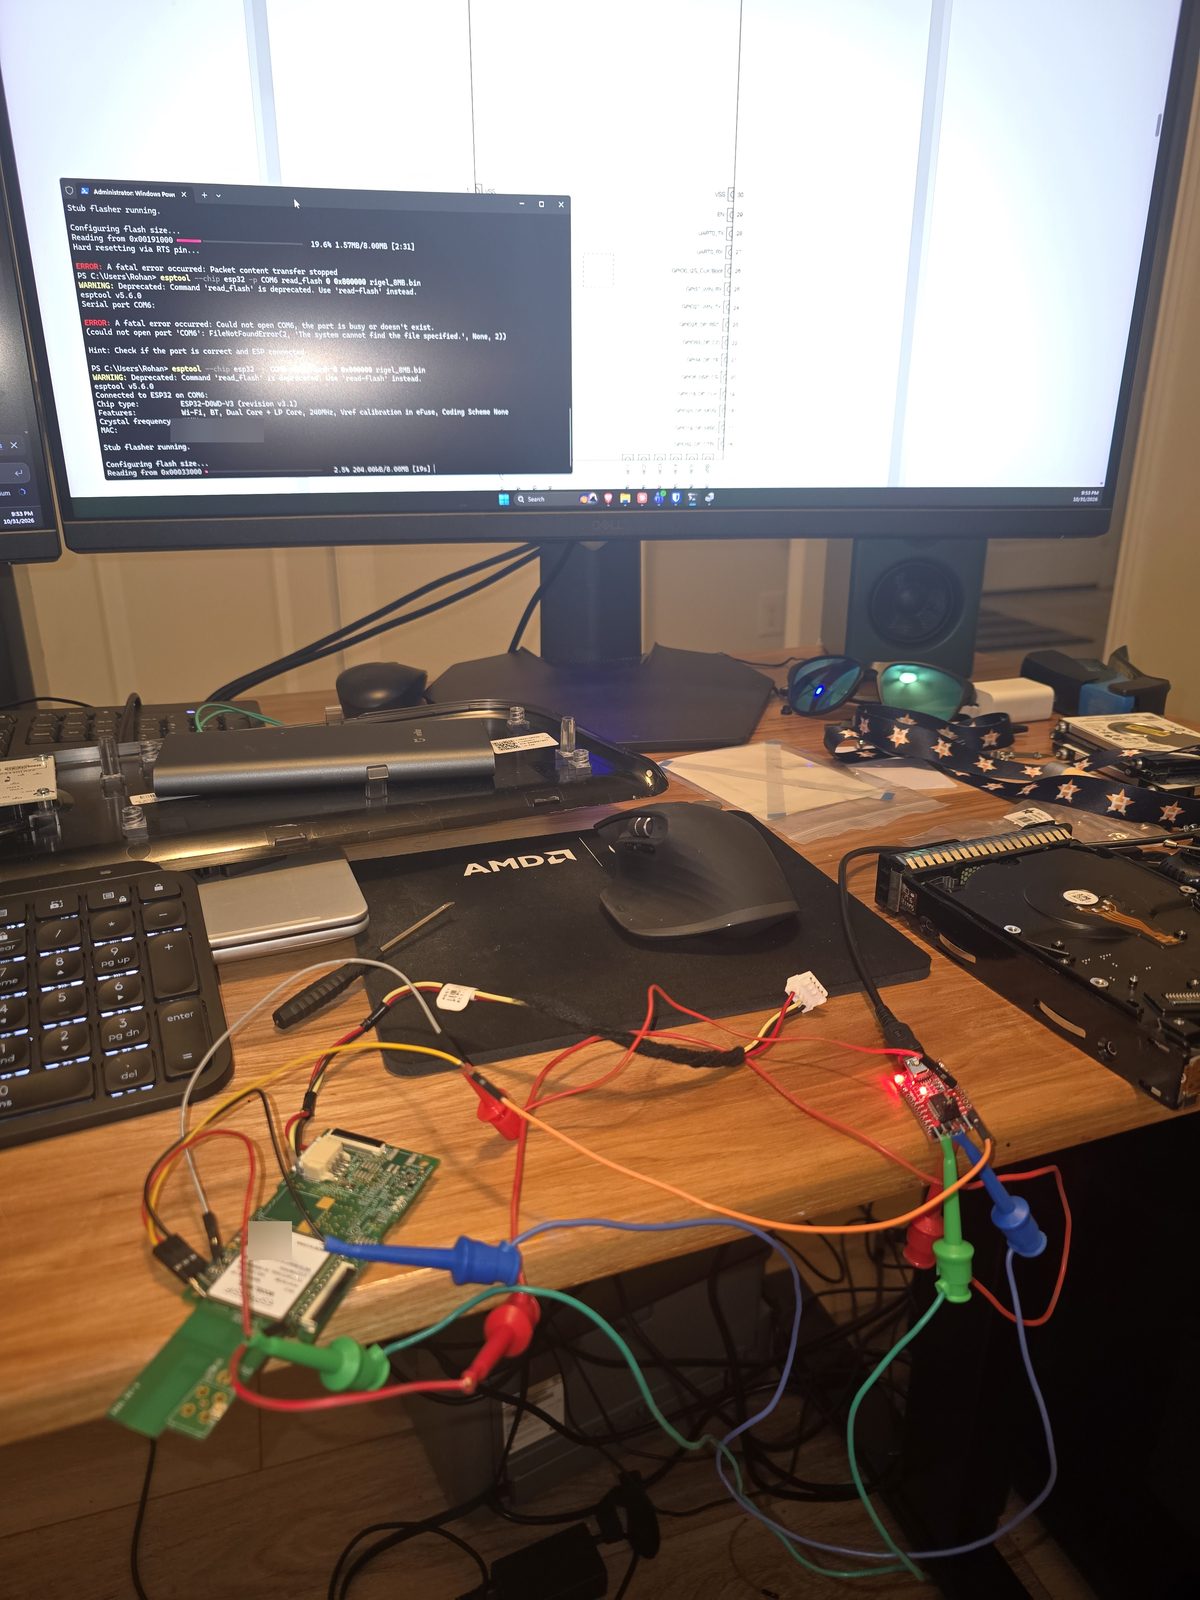
Before experimenting, I wanted a way back. I soldered a USB-serial adapter to the programming pads and read the entire flash chip with esptool. Two surprises:
- The chip was 16 MB, not the 8 MB in the FCC photos.
- The module is completely unlocked: no secure boot, no flash encryption. That means the stock firmware can always be written back, so nothing I try later can brick it.
The long single read kept failing its final checksum (a marginal wire, probably), so I read it in 1 MB chunks, each verified, and that worked first time.
That backup stays private. It contains my Wi-Fi password, the unit’s serial numbers and Whirlpool’s code. If you make your own, tools/rigel_flash_decode.py summarises it without printing the sensitive parts.
Step 4: Read the firmware for clues
The firmware turned out to be written in JavaScript on the Moddable XS engine, which made the strings unusually readable. It gave us the vocabulary: names like MachineState, STATE_ACU_RUNNING, Door_Status, Estimated_Time_Remaining, and the classes that drive the internal bus, which Whirlpool calls WIN. There was even a built-in “sniffer” mode, a nice hint that listening to the bus is a normal thing to do. More in docs/firmware-notes.md.
What it didn’t give us was the actual bytes: the baud rate, the frame layout, the checksum, or which number means “running”. For that I needed to listen to a live dryer.
Step 5: Listen, don’t talk
This was the key decision. The dryer’s main control board does all the real work; the Wi-Fi module is just a bridge. So rather than replace the module, I added a second, tiny ESP32 (a Seeed XIAO ESP32-C3) wired receive-only to the bus pads. It can’t send anything, so it can’t confuse the dryer. The stock module and the Maytag app keep working exactly as before.
The XIAO runs ESPHome. The first version just dumped raw hex to the log and let me switch baud rates from Home Assistant. 19200 was garbage, 57600 was garbage, 38400 was clean.
Step 6: Decode the frames
With clean bytes, the structure jumped out:
[~sender] 10 02 ADDR SEQ LEN PAYLOAD… CRC8 [10 06]Every frame starts with 10 02, has an address byte (sender in the top half, receiver in the bottom), a length, the payload and a checksum. The checksum took some guessing, but CRC-8 with polynomial 0x31 matched all 400 frames in the first capture. There are three boards talking: the main control, the front panel, and the Wi-Fi module. The full field guide is in docs/win-bus-protocol.md, and tools/win_decode.py decodes raw logs into frames.
Then came the fun part: doing something to the dryer and watching what changed. I ran a short Quick Dry cycle while noting the time of everything I did: open the door, close it, start, pause, resume, change the temperature, toggle Wrinkle Prevent, wait for cooldown, finish. Lining those notes up against the capture made the main status message readable:
- one byte for the machine state: idle, running, paused, complete
- one byte for the door
- two bytes for seconds remaining
- bytes for the cycle phase, including cooldown
Machine state
01 idle, 02 running, 05 paused, 04 complete. Laundry done is this byte going from 02 to 04.
Turning the cycle knob through every position mapped the cycle IDs. Sending settings from the Maytag app showed how the module writes a whole settings record to the main board, and it even turned up a one-shot command byte that switches the drum light.
Step 7: Make it useful
The final ESPHome config parses frames on the XIAO itself, checks the CRC, and publishes proper entities: dryer state, door, time remaining, cycle, temperature, dryness and Wrinkle Prevent. “Laundry done” is simply the state going from Running to Complete, and Home Assistant handles the notification from there, gated by whether we’re home, asleep or have friends over. There’s a minimal example automation in the repo.
Publishing it
I couldn’t find anyone who had documented this bus for a Whirlpool-family dryer, so I cleaned it up and published it. That meant leaving some things out on purpose: no firmware, no flash dump, no certificates, serial numbers or network details. The repo has the protocol notes, the hardware pinout, both ESPHome configs, a frame decoder, a tool that summarises your own flash dump while hiding the sensitive parts, and the decoded captures.
- README: start here
- WIN bus protocol: framing, nodes, the status and settings messages
- Hardware: RIGEL pinout, backup and restore, sniffer wiring
- ESPHome sniffer and the raw capture config
- Captures: decoded frames and the timed action markers from the test cycles
What’s next
Writing to the bus. The app traffic shows exactly what a cycle-settings write looks like, so the next time the console is open I’ll add a transmit wire and a switch to hold the stock module in reset. Remote start will stay locked behind the dryer’s physical Remote Enable button, and honestly that’s the right call for a gas appliance.
If you have a Whirlpool, Maytag or KitchenAid machine with a RIGEL module and want to try this, captures from other models would be very welcome.